Official ManualFirst Connection
Shadowrocket Setup Guide
Import your existing connection details, then choose a routing mode. After connecting, visit a webpage to confirm that your settings work.
Add a server or import a subscription
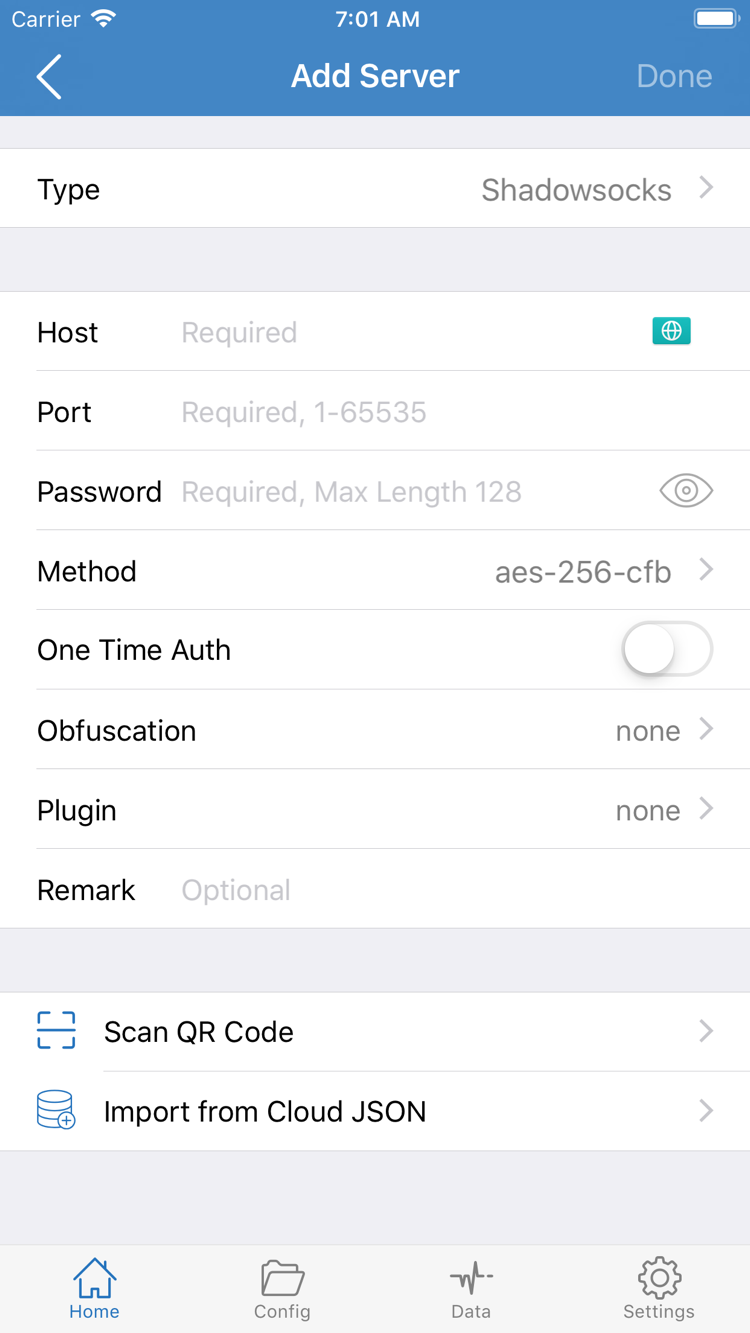
Open Shadowrocket and find Add Server under the SERVER group on Home. Choose the action that matches the details you have: manually add a single server if you have its protocol, address, and port; use Subscribe if you have a link that retrieves a server list. These details serve different purposes—a subscription link does not belong in the Host field for a single server.
One server: choose Type, then fill in the fields
In Add Server, open Type and choose the protocol specified in your details, then enter Host and Port. Available fields vary by protocol. If you see Password or Method, enter the values from your existing details; do not fill a blank field with a value from another server. For example, enter an address and port in their separate fields rather than appending the port to the address. Before saving, check for spaces or line breaks at the beginning or end of the address.
Subscription link: import with Subscribe
Under Type in Add Server, choose Subscribe, paste the complete existing subscription link into the address field, and save. Do not split the link into a hostname and port or remove the parameters after the question mark. Return to Home and expand the subscription group after it loads. Link parameters may contain access credentials, so do not post the full link publicly or include it in a screenshot.
Before moving on: Find and select an available server under SERVER. For a manual setup, confirm the entry appears in the list; for a subscription, confirm the group contains entries. A successful save only means the details were stored—it does not prove the server is reachable. If the list is still empty, follow Step 5 to check the import. There is no need to toggle the connection repeatedly.
Choose a Global Routing mode
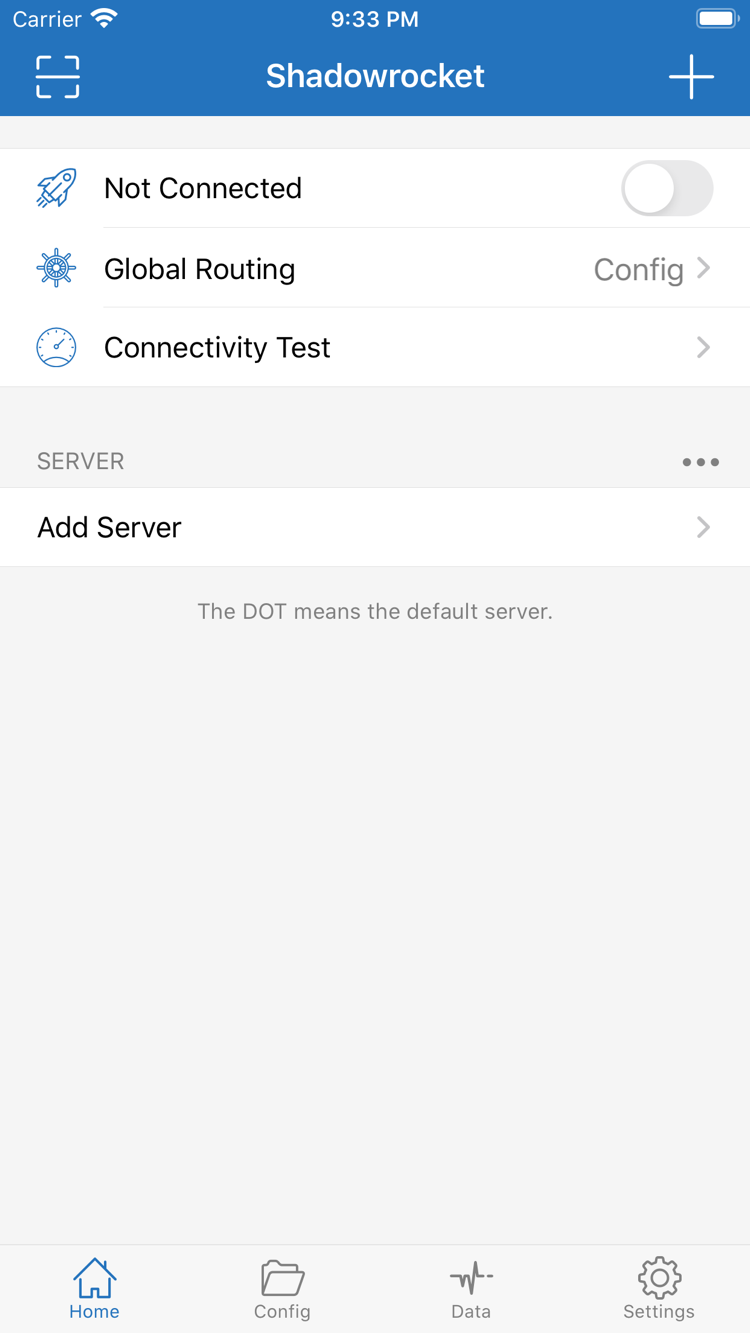
After selecting a server, stay on Home, tap Global Routing, and choose a mode for what you want to do. This setting controls how traffic is handled, not which server is selected. For example, selecting an entry under SERVER and then switching to Direct does not make ordinary traffic use that server as a proxy.
- Config
- Matches traffic against the rules in the currently enabled configuration file. Requests matching
PROXYuse the proxy, requests matchingDIRECTconnect directly, and requests matchingREJECTare blocked according to the rule. Choose this mode for everyday rule-based routing when you already have usable rules. - Proxy
- Uses the currently selected server for traffic routed through the proxy. During initial troubleshooting, you can switch to this mode briefly to check whether the server can access an ordinary webpage. After testing, switch back to Config if you rely on rules for everyday routing.
- Direct
- Provides a direct-connection comparison. For example, if the same webpage opens in Direct but not in Proxy, check the selected server and test results first rather than editing rules.
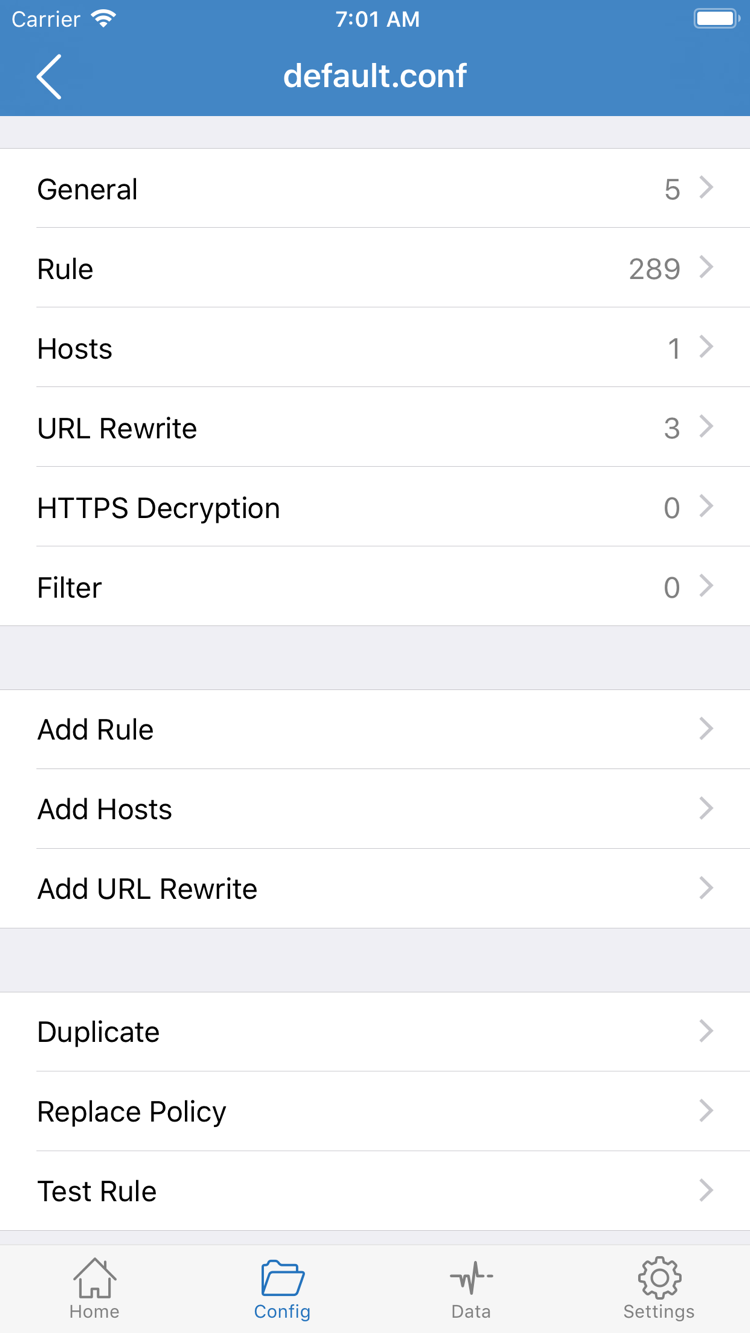
Two different Config screens: Config in Global Routing is a mode; the Config tab at the bottom manages configuration files. To review rules, find the file currently in use in the bottom Config tab, open its editor, and check Rule. Add Rule in the screenshot adds a new rule; you do not need it for the first connection. If there are multiple files, note which one is enabled so you do not use rules from a different file to interpret test results.
If you are unsure whether the rules are correct, first use Proxy to test a destination, then compare the result in Config. See proxy modes for rule order, fallback policies, and domain matching. You do not need to adjust these during the first connection.
Connect from Home
Return to Home and check two places: the mode shown next to Global Routing and the selected entry under SERVER. To test the proxy, choose Proxy and select a server. To test existing rules, choose Config and confirm that you reviewed the configuration file currently in use. Once both are confirmed, turn on the switch beside Not Connected at the top.
The first time you connect, the system may ask to add a VPN configuration. This authorization lets Shadowrocket establish a network tunnel; it is separate from saving a server in Add Server. Confirm that the prompt follows the action you just initiated and names Shadowrocket, then allow it as directed by the system. If the system asks you to verify your device identity, complete that step and return to Home. If you canceled the authorization, do not change the server password or port yet. Start the connection again with the top switch and check whether the system prompt reappears.
Back on Home, wait for the status transition to finish and check that it does not immediately return to Not Connected. If the switch turns off, note when it happens: before you tap the system prompt, after authorization returns to the app, or after the connection has been active for a while. For the first two cases, check whether authorization was completed and whether another system VPN is active. For the last case, also note whether the device switched from Wi-Fi to cellular or just resumed from the lock screen before disconnecting.
A connected status at the top only means the system connection is established. It does not mean every request uses the proxy or prove that the selected server can reach the target website. Keep the selected server and mode unchanged, then proceed to the next test. If you also switch networks, change servers, and modify the mode, you will not know which change made the webpage work again.
Verify the connection and routing
Tap Connectivity Test on Home and review the result for the selected entry. A normal result only shows that the test method and destination were reachable at that time; it does not replace an actual request from a browser or another app. Conversely, a single timeout does not necessarily mean the server is unavailable: if the test destination is temporarily unreachable, the website you need may still work. Note the result, but do not immediately change several settings based on one test.
Next, open a webpage you can normally access and refresh it or visit a page that has not been opened yet. A previously loaded browser tab may show cached content. To check whether the server works, keep the same network and server, then reopen the same destination in both Direct and Proxy. Wait for each mode switch to settle before visiting the page. Downloads in progress and existing long-lived connections are not suitable for this comparison.
If the same webpage opens in both modes, that only means the destination is reachable under both conditions; the page content alone does not show which route it took. If both modes fail, first check whether the device can reach another destination that normally works. If only Proxy fails, return to Home to review the server test result and check the protocol, port, and authentication details you entered manually. If Proxy works but Config does not, check the enabled configuration file first; there is no need to import the server again.
When using Config, choose one destination expected to match PROXY and another expected to match DIRECT in the existing rules, then make a new request to each. Note the full domain you visit, and check whether the page redirects to another domain or whether the failure affects the main page or another resource it loads. To confirm the exact matching rule, compare the visit time and destination domain with the diagnostic records. When testing is complete, restore the Global Routing mode you intend to use every day.
Troubleshoot imports, connections, and rules
Subscription saves, but the group has no servers
Return to Step 1 and check that you chose Subscribe. Then confirm you pasted the complete link, not a subscription name or a service provider's webpage address. A chat app may include punctuation at the end when copying, or a long link may be copied only in part. Check that the device has a working network connection, then import again and wait for the list to load. If it is still empty, ask your existing service provider whether the link is valid and what format it returns. Do not submit an address containing credentials to a public testing tool.
The switch turns off immediately, or reconnects after being turned off
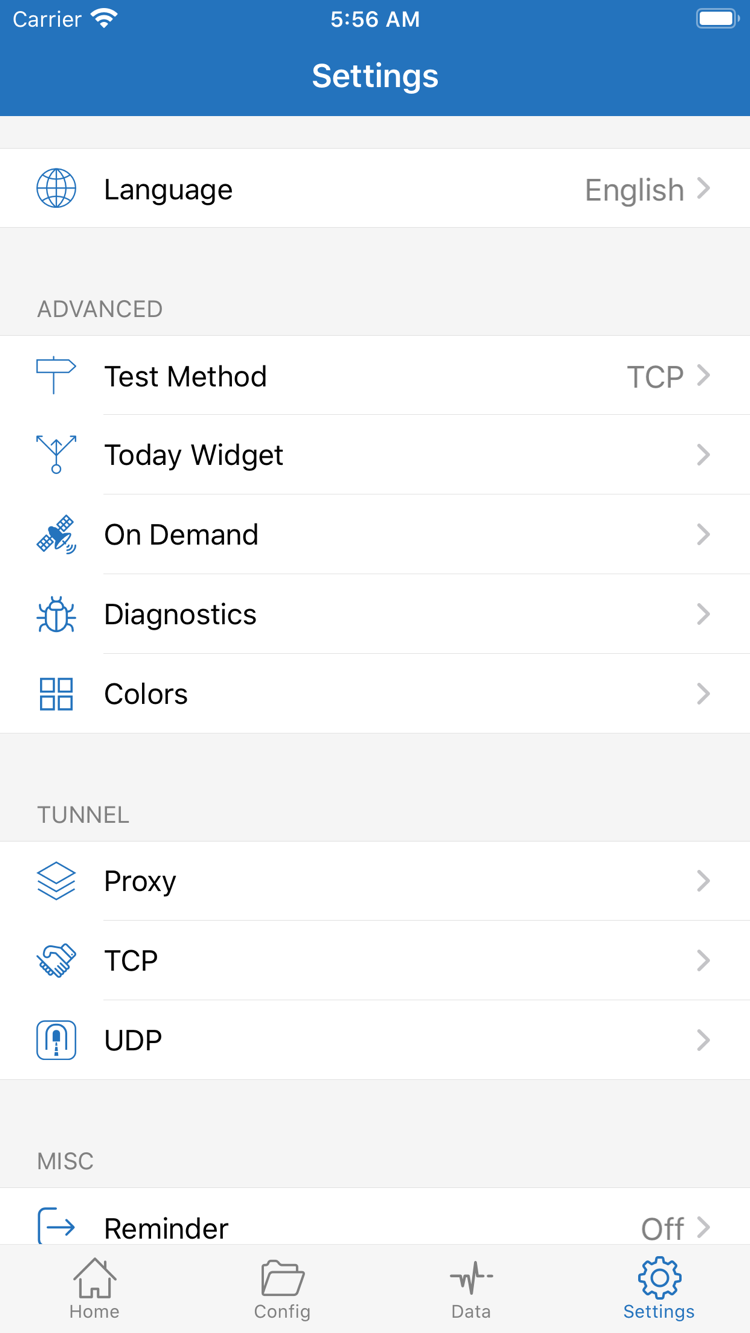
If the switch turns off immediately, first check the initial VPN authorization and the system connection status. If the device is managed by your employer or school, do not remove organization-provided configurations; check with your administrator first. If the issue is that the connection resumes after you turn it off manually, check whether On Demand is enabled in Settings. Note the original setting before troubleshooting. If appropriate, temporarily disable on-demand connection and run a manual test with the Home switch. Record the result, then restore the settings you need. There is no need to delete the system configuration at the outset.
Speed test and actual access results do not match
Check Test Method in Settings, note the current method, then return to Home and run Connectivity Test again. If the browser works but the test fails, first distinguish the test destination from the destination you actually need. If the test succeeds but the webpage fails, compare Proxy with Config. Do not change the test method, server, and network at the same time, or the results will not be directly comparable.
Only some destinations are routed unexpectedly
Open the currently active file in Config and check whether an earlier rule under Rule matches the domain first, or whether the request reaches the fallback policy. After reproducing the issue, check Diagnostics in Settings and compare the visit time and destination domain with the records. Before making changes, note the original rule and its position. Change one thing at a time, then make a new request to test it. When sharing troubleshooting details, include only the necessary mode, time, and error text; hide server addresses, passwords, and complete subscription links.
Once the connection is stable, see settings explained for information about DNS, On Demand, and diagnostics. You do not need to adjust every item in Settings to complete the first connection.